12gaugegirl

Wild Game Bone Broth French Onion Soup

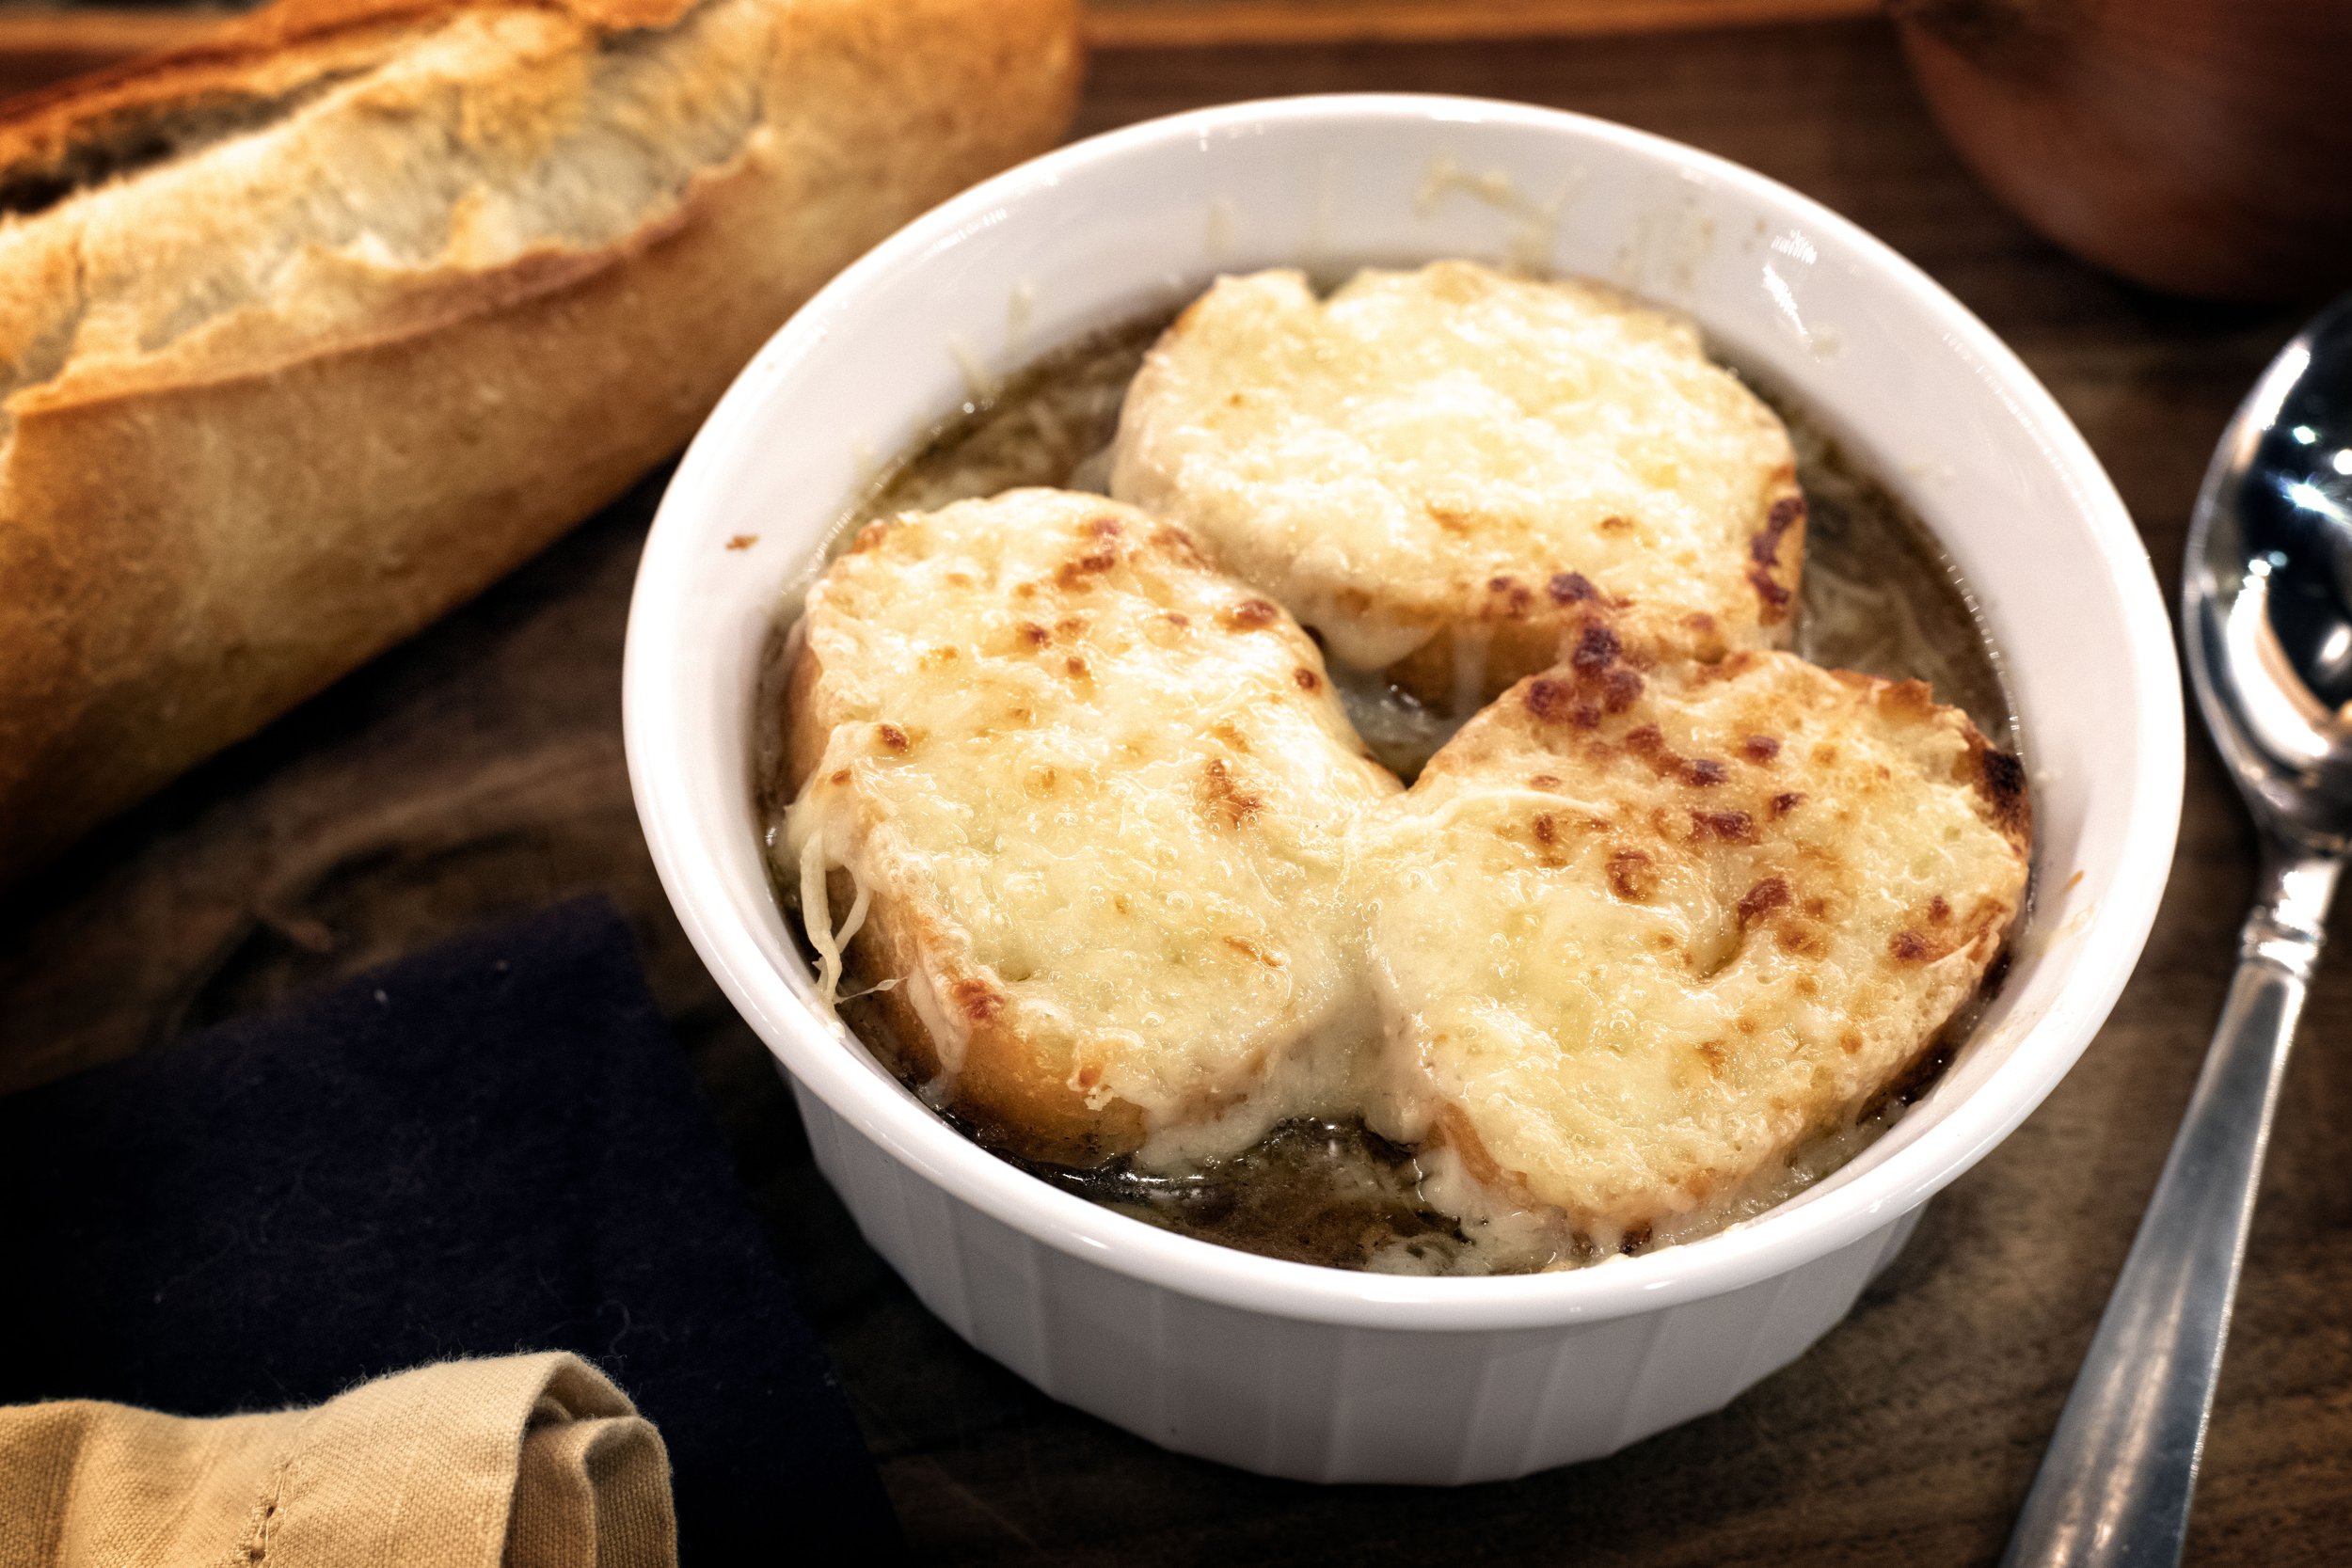
Wild Game Bone Broth French Onion Soup. After the sun has pulled the covers up and tucked itself in for the nigh and the cold starts to set in, does anything sound better than warm soup? I don’t think I feel happier and cozier than when I have my hands wrapped around a steaming bowl of French onion soup topped with gooey, melty gruyere cheese and homemade wild game bone broth.

JUMP TO RECIPE

Wild Game Bone Broth French Onion Soup

French onion soup is an OLD dish. Like think 8,000 years old. There are many different versions of how it first came around, but my favorite is the one where King Louis XV returns from deer hunting to bare cupboards. He rounds up some onions, butter, and champagne (which seems odd that his cupboards are bare, but champagne is around, but anyway), throws it all in a pot, and voila, French onion soup is born.

French onion soup was commonly considered the food of the poor because onions were cheap, easy to grow, and plentiful throughout Europe. The soup became popular in the 1960s in America along with the nation-wide trend of French cuisine in general.

To me, if French onion soup is the food of the poor, I don’t want to be rich. It’s one of my favorite meals. The ingredients are simple and easy to find, but the flavor developed from simply simmering caramelized onions in silky bone broth is downright amazing!

So, without wasting more time, let’s make Wild Game Bone Both French Onion Soup!

The Wild Game Bone Broth

You can make this recipe with store-bought beef broth, which is fine, but this is a wild game website, so I am going to share really quick (like the condensed, superfast version) how I make homemade wild game bone broth. I make a huge batch at one time from any of the bones I have in the freezer. Many times, the broth will be a combination of elk, deer, and pronghorn bones.

I roast the bones in a 400-degree Fahrenheit oven for one hour. I also do two or three onions, just cut in half and you don’t even have to remove the skin, and a couple of big chunks of ginger, I don’t even peel it.

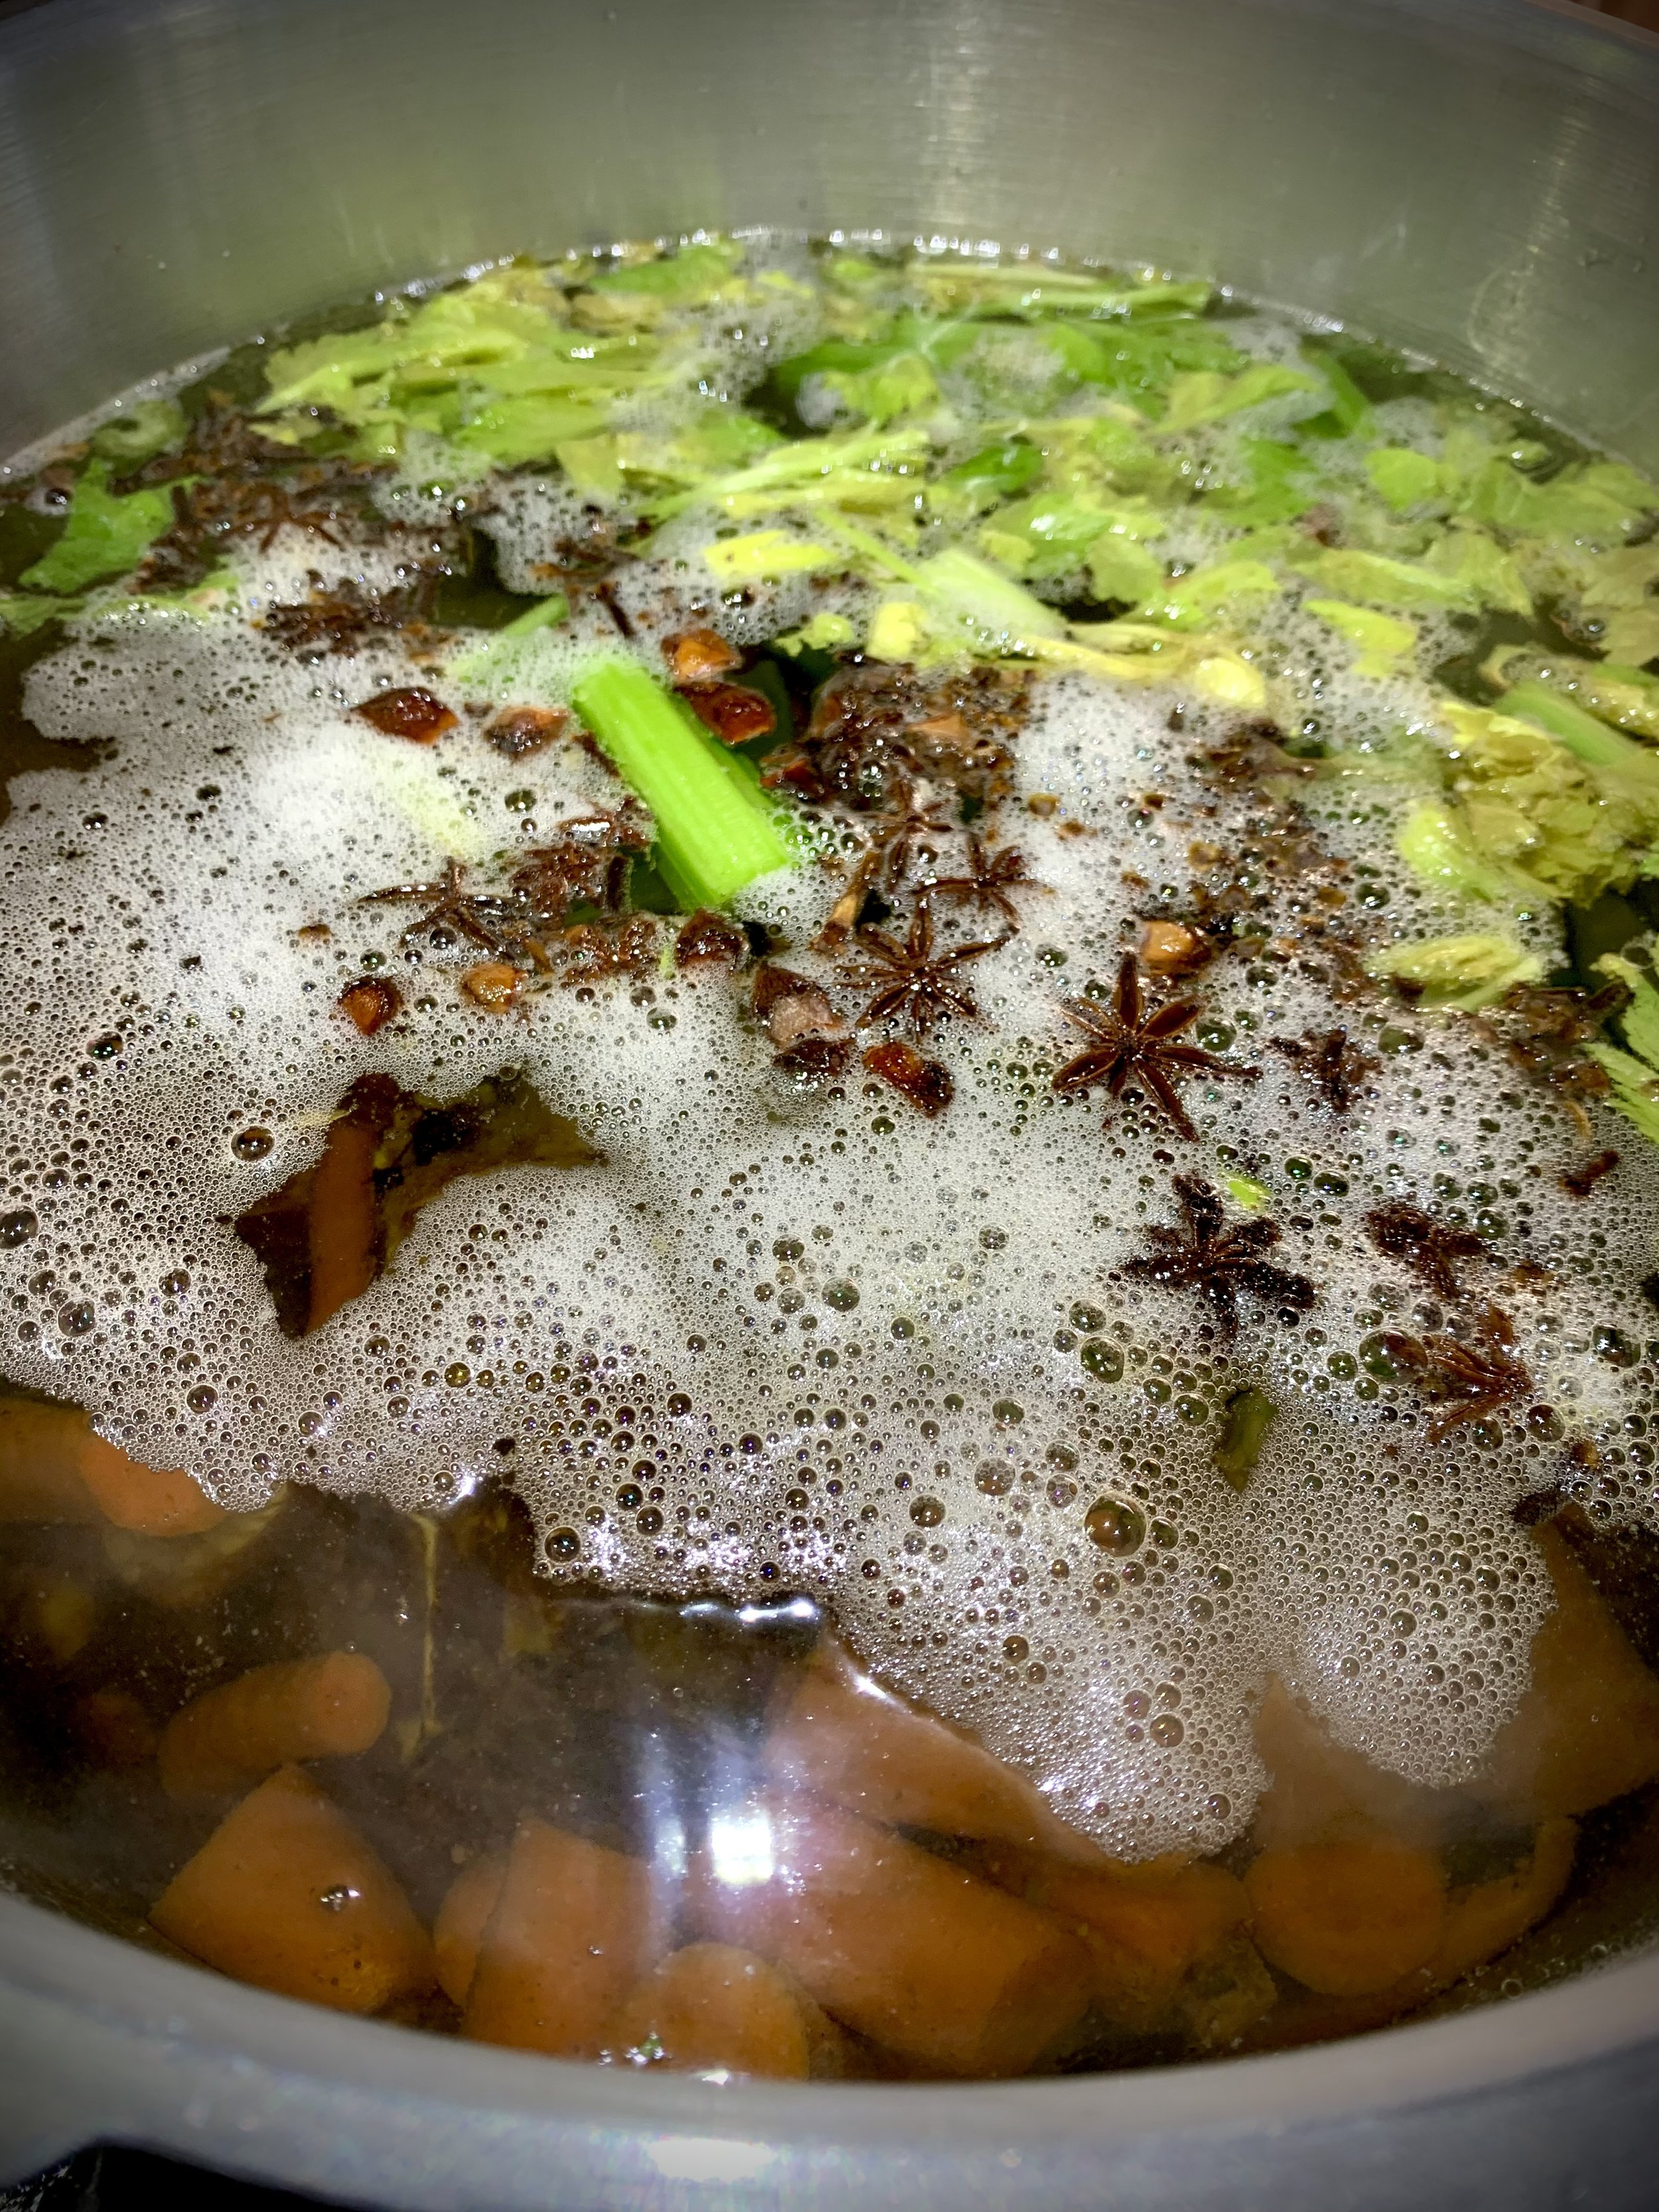
After the bones are roasted, I put them, the onions, ginger, about six carrots, a bunch of celery, a couple of star anise pods, and a handful of whole cloves into a large stock pot. I cover everything with water, so this could end up being up to 24 cups of water if the pot is large like mine, and let it start simmering for hours. When I say hours, I mean like six. I reduce the liquid by about three quarters. Pour through a fine mesh sieve and scrape any fat from the top.

I don’t add salt to my bone broth. I just salt it when I use it so I can get it the way I like. Also, because it is so concentrated after hours of simmering, it doesn’t take up much room in the freezer. I freeze it in little pint-sized containers and then when I use for a recipe later, I add back in the water. So, for a pint of broth, I would add eight to twelve cups of water back in, depending on what I am doing.

Let’s Make French Onion Soup

Now that the broth is ready, it is time to start the onions. To a large skillet over medium heat, add a couple of tablespoons of olive oil, enough to coat the entire base of a ceramic dutch oven, and a tablespoon of butter. Once the butter is melted, add the onions. I slice the onion into long strips for this soup.

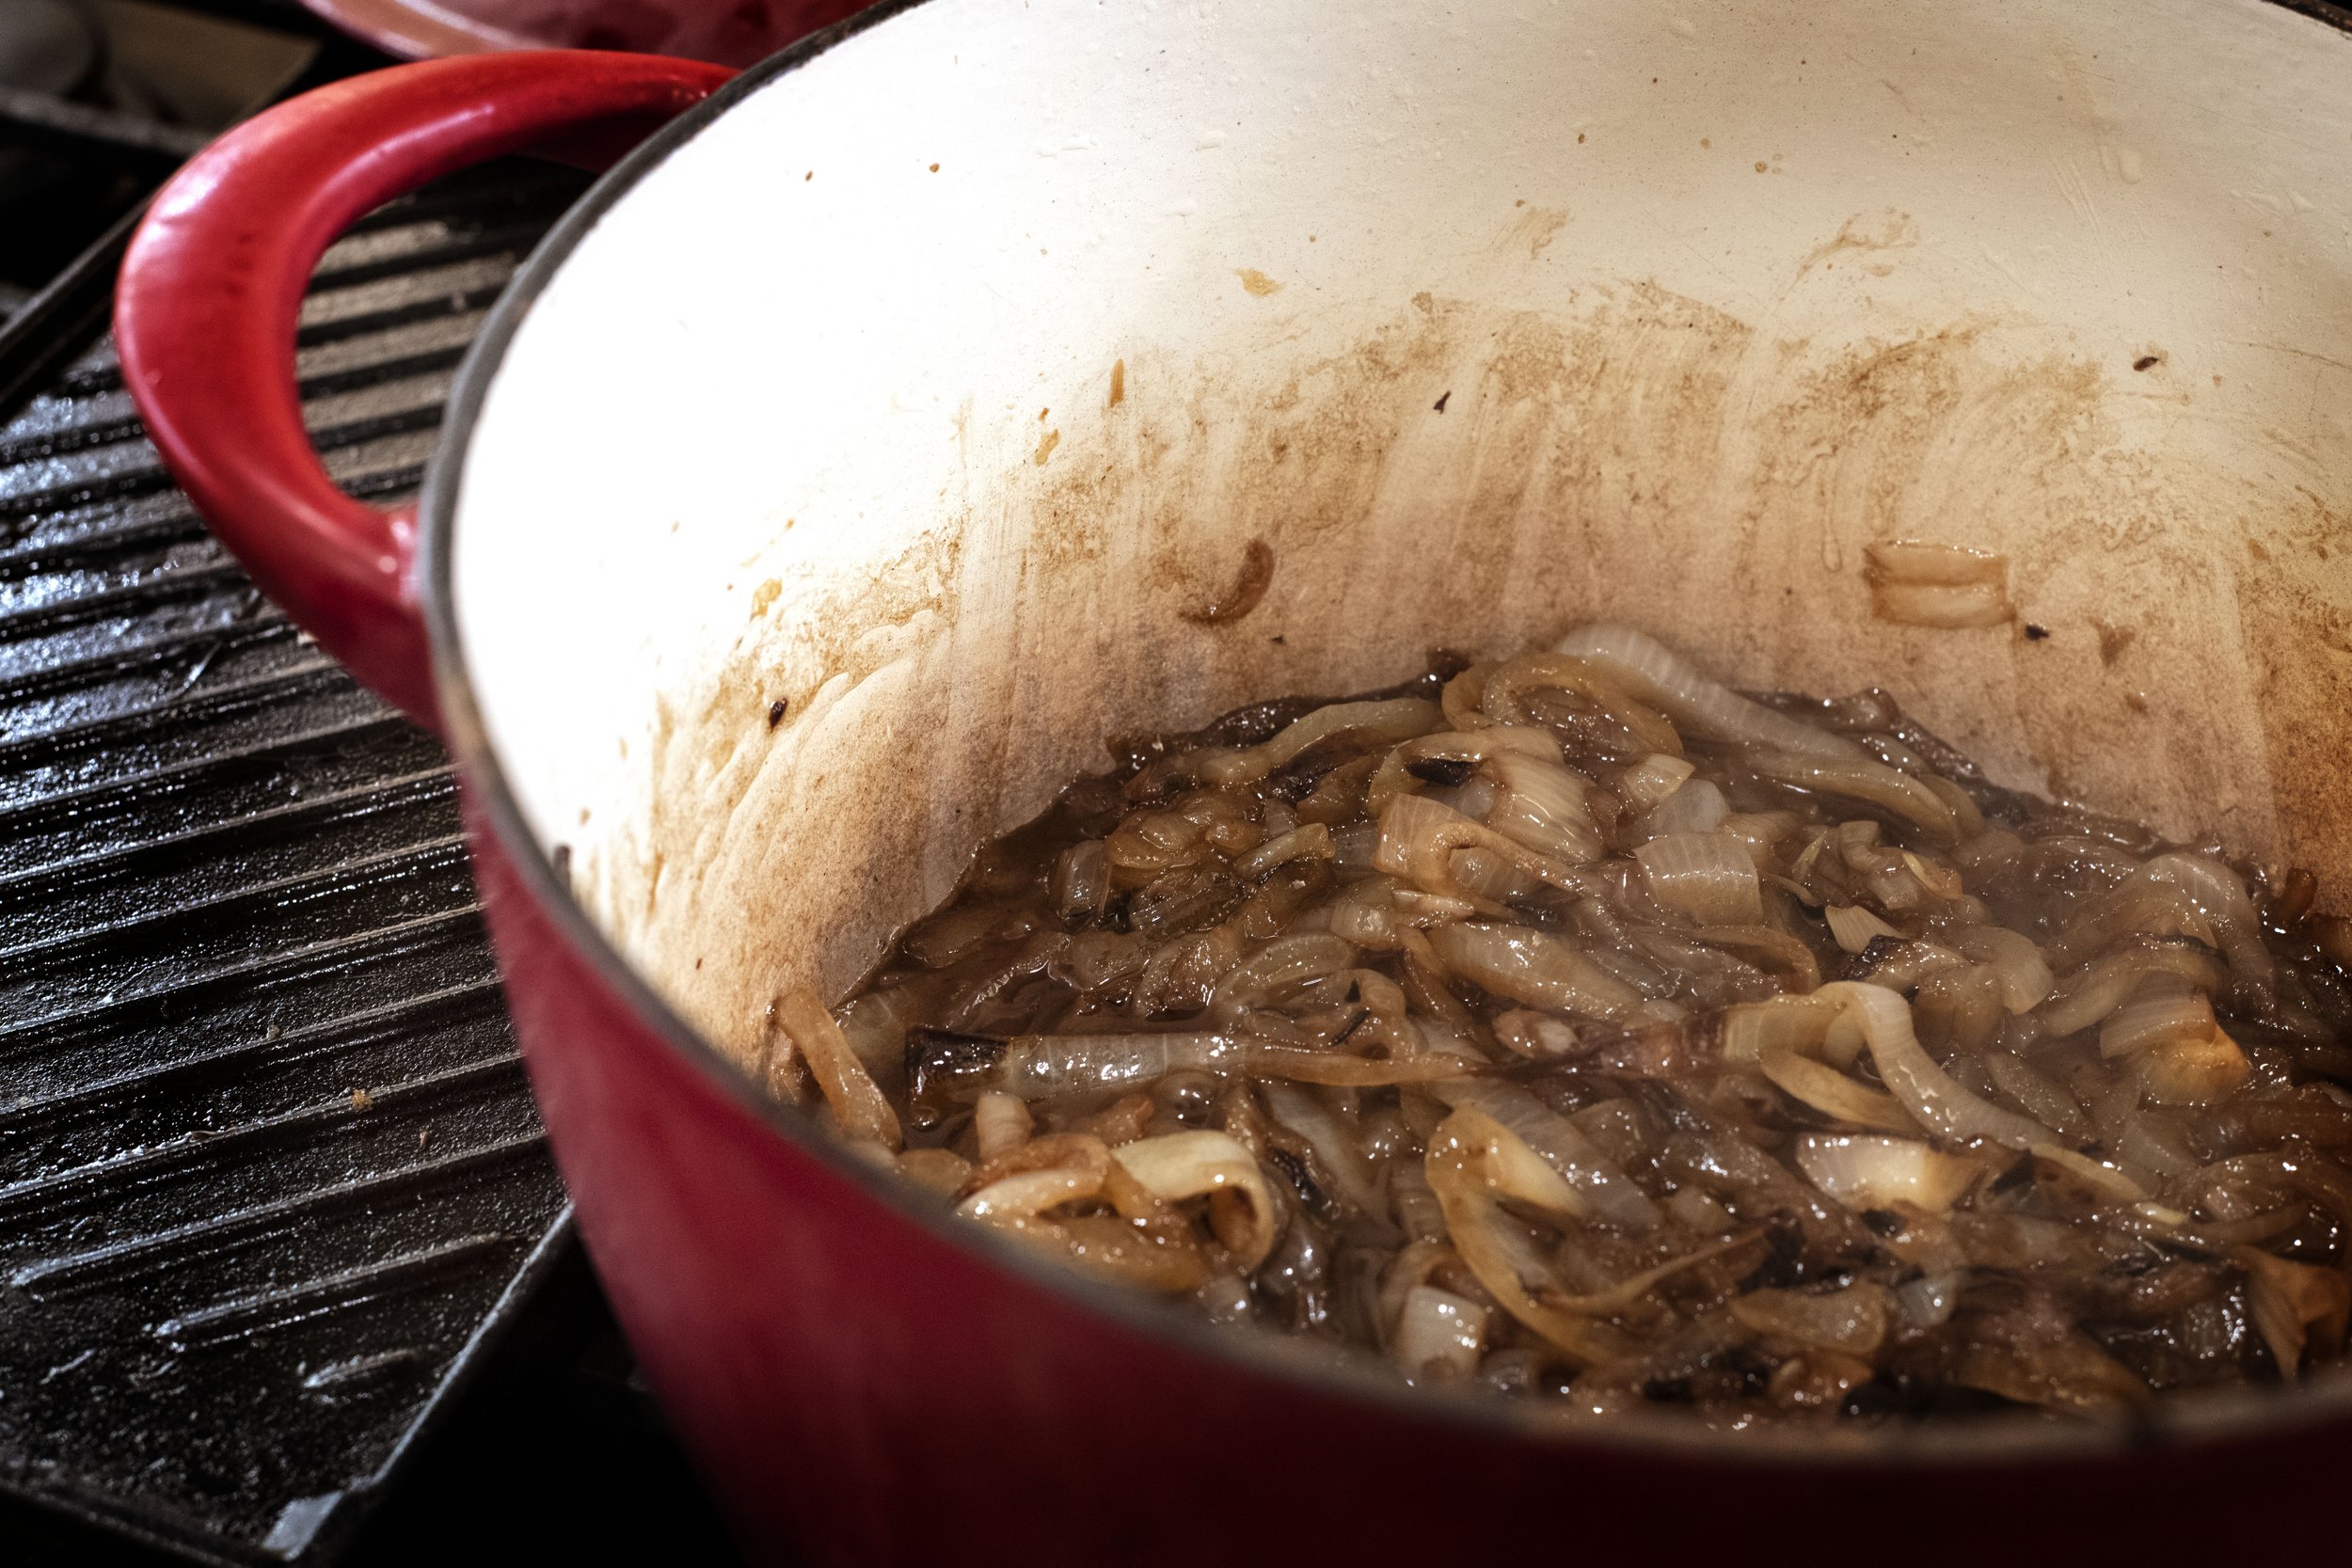
Spread the onions out and make sure they are coated in the oil. Let them cook for ten minutes, stirring often to keep them from sticking to the pan or burning. If they are cooking too quickly, you may need to reduce the heat a little. You are looking for a slow caramelization here.

After ten minutes, sprinkle a tablespoon of salt over the onions to develop even more flavor. I also add a teaspoon of sugar. It helps with caramelizing. Cook for twenty minutes more.

Once the onions are golden, and caramel-y, and smell like heaven, they are ready. Deglaze the pan with a cup of wine, red or white will work here, and be sure to scrape all that flavorful goodness from the bottom of the pot.

Add the pint of reduce wild game bone broth and eight to twelve cups of water. Bring to a gentle boil, and we will add even more flavor to this dish! Add two tablespoons of Worcestershire sauce, a tablespoon of Italian seasoning, and salt and pepper to taste.

Reduce the mixture for thirty minutes on a simmer. Add a quarter cup of sherry.

While your soup is doing its thing, toast sliced pieces of French baguette in the oven. I toast them under the broiler for five minutes. If you brush them with a little butter or olive oil first, you will get a beautiful, crunchy golden crust.

It’s time for the fun part: melting the cheese. Fill an oven safe ramekin with a cup or two of the French onion soup base. Nestle a few pieces of the toasted French bread into the soup, and then top it with shredded gruyere cheese. I do a ramekin per person.

Place the ramekins in the oven at 350 degrees for about ten minutes. The cheese should be melted and slightly browned (cue drool), and the broth slightly boiling. Aaaannnndddd…it’s time to eat!

Happy Hunting!

If You Like This Recipe, You Might Also Like…

Pronghorn Pumpkin Ale Chili

Venison Real Texas Chili

Elk Guinness Stew

Deer Liver Whiskey Apple Pate

So, I did an offal thing. It was completely out of character for me. I made deer liver pate. Every year while people are cleaning their deer I comment how “someday” I am going to use the organs from a harvest and make…something.

JUMP TO RECIPE

“When the blood in your veins returns to the sea, and the earth in your bones returns to the ground, perhaps then you will remember that this land does not belong to you, it is you who belongs to this land.” ~ Native American quote

I have had deer heart once before. But it wasn’t mine. And I didn’t prepare it. It was surprisingly good. That is about all of the adventure I have embarked on when it comes to organ meat, but I have read a lot about keeping organs and the benefits of their consumption.

Traditionally, hunters never discarded the organs. Organs were harvested and prepared for their nutritional benefits. They are excellent sources of minerals and vitamins. But don’t take my word for it. Here’s an article with lots of information about the benefits of organs.

I heard this thing recently, and this could all be rumor but I am going to share it anyway, that James Blunt, you know the celebrity, went on an all meat diet and ended up developing scurvy, the “sailor’s disease.” Scurvy is incredibly rare, but one way to develop it is to become a carnivore.

Scurvy is basically when your body becomes depleted of Vitamin C and you develop a vast collection of issues such as weakness, fatigue, wounds that don’t heal up properly, and other stuff. It doesn’t sound fun. James Blunt cured his scurvy by consuming orange juice until he developed acid reflux.

So, the moral of the story seems to be that being a carnivore doesn’t work if you’re a human. Or does it? Historically, there are groups of humans who survived solely eating meat. The best example is the Arctic Native American tribes the Inuit. The arctic tundra is not a suitable landscape for growing crops, so the Inuit diet consisted of fish and the mammals they hunt, including seals, walruses, and whales.

Obviously they do not develop scurvy or the other illnesses associated with being a carnivore. How is this possible? While many things most likely factor into the equation, there are two habits the Inuit engage in that researchers believe keep them healthy and able to survive of a solely meat-based diet.

First, the Inuit eat most of their meat raw, both mammals and fish, and this is thought to sustain more of the vitamins and minerals contained within the meat. Second, they eat the organs.  If you want to know more about the Inuit and their all meat diet, this is a great book: My Life with the Eskimo.

So, in conclusion, I would like to send a message out to James Blunt. Next time you go full carnivore eat your organs!

Now that’s out of the way, let’s make this venison liver pate.

Pate was much easier to make than I initially thought. There are lots of different ways to make your liver concoction. You can vary which type of liver you use, what type of spices or vegetables you mix in, and even the fat you add at the end can be different. It’s basically a choose your own adventure with pate.

The key to a successful pate is to remove some of the rich “bloody” taste that liver is known for. Just to give you an idea if you haven’t tried liver, it has a strong iron taste.  It is very distinct and lies somewhere between metal and blood.  It is so distinct, you will always recognize it in a dish no matter how little is used.  If you asked me what iron tasted like, I don’t know that I could find the words to accurately describe it, but if you had me taste something that is rich in iron, like liver, I could immediately pick that flavor out. While you can’t fully remove this definable characteristic of liver, you can lighten it. You want a pate that is reminiscent of the liver flavor. Achieving this is quite easy. I soaked the liver overnight in a mixture of salt and water. I used four cups of water and two tablespoons of salt.

In the morning, the liver had a more muted color. I thoroughly washed the liver, removing any access blood from it, and then cleaned off any thing that didn’t look edible, such as arteries or connective tissues. Just make it pretty.

Heat up a large, heavy bottomed skillet or a dutch oven. I used a very large cast iron skillet for my pate. Cook up five or six slices of bacon until crispy. Pull the bacon and set aside, but reserve the fat in the pan to use for sautéing your vegetables.

To your hot bacon grease, add one diced onion, four diced carrots, and 4 diced celery stalks. Also add in one chopped apple. It isn’t important the size you dice up your vegetables to, since you will ultimately puree everything, but try to keep the size uniform so your vegetables will cook evenly.

Cook the vegetables for about five minutes and then add the chopped liver. Season with salt, pepper, and oregano. Cook until the liver is cooked through, about ten to fifteen more minutes.

Drizzle in the cup of whiskey at this point and let things reduce for five to ten minutes. The mixture should be thick and the wine along with the starches from the vegetables should create a creamy coating over everything.

Alright, it’s time to turn this pile of vegetables and liver into pate! Be careful with this next step, as things tend to be hot and steamy. Fill a food processor with the liver mixture. I had to add about half the mixture, blend until it broke down into a paste, and then add the second half. If you have a larger food processor you may be able to fit the entire pan in one large batch.

Don’t forget to add your bacon back into the pate mixture at this point. I just dropped the pieces in whole and let them blend down, much to the dismay of the dogs who were very certain the bacon was going to be theirs’.

Grind until things are smooth. Slowly drizzle in your cup of heavy cream. If you are looking for a dairy free option you can use a can of coconut cream and it works nicely too. The cream really changes the consistency of the entire dish. It creates a beautifully smooth, creamy texture that almost melts in your mouth.

Afterwards, put the pate in the fridge to cool for at least two hours. It tastes best cold. You can preserve it if you aren’t going to use it immediately, like say you are making it for your party tomorrow, by pouring melted butter over the top. This creates a nice seal on top.

Alright, let’s serve this pate up! This was my first time eating pate. It was actually my first time eating liver ever. I will admit, it took me a few bites to wrap my head around it. It is rich! It is earthy! It is…a lot.

One thing I learned is how you serve pate can change everything. Just pate on a little slice of bread isn’t my most favorite presentation. It just tasted like liver. Which isn’t a bad thing if you are a liver fan. My parents, having grown up on liver and onions, loved it just plain. I needed a little more bling for my pate.

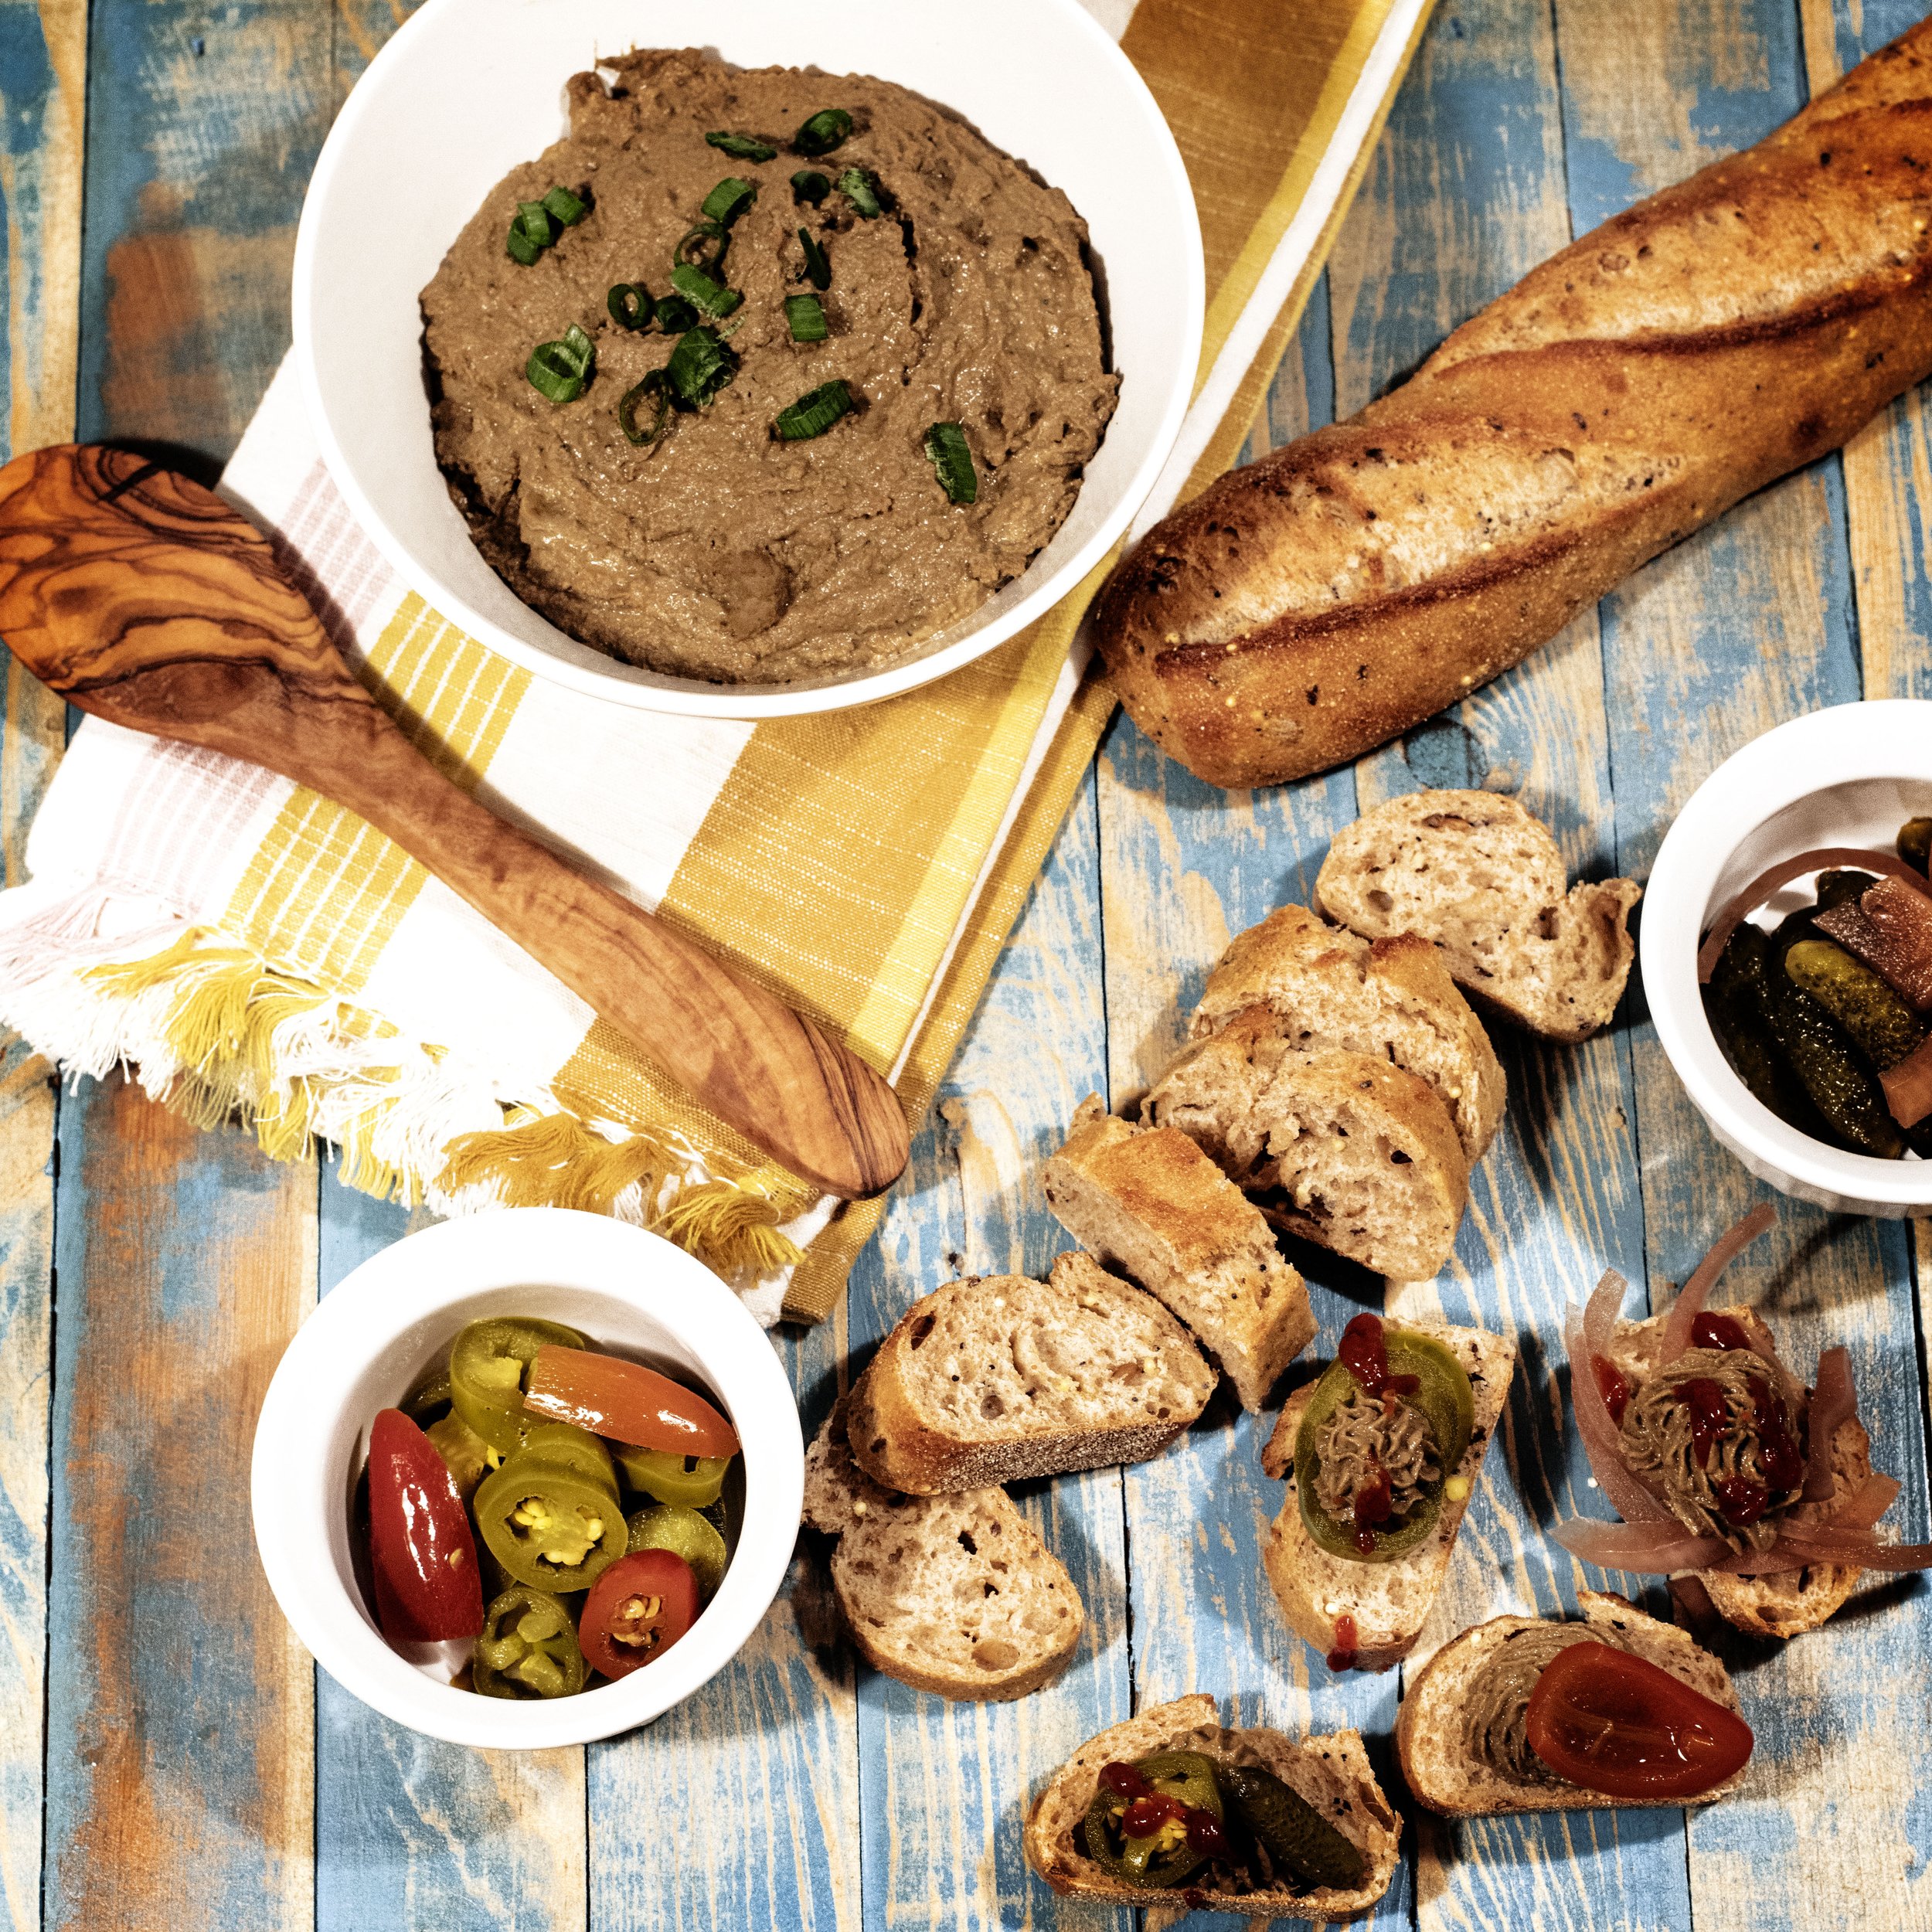
So, to plate up your pate, first toast a thin slice of baguette. Add a little butter to your slice. Smother some pate on top. Finally, garnish with a pickled vegetable of your choice. The most popular is a cornichon pickle. My favorite was pickled red onion. Other options are pickled jalapenos, capers, cucumbers, pickled beets, or radish slices.  Another item that made it that much better was to add a drop of a mustard based hot sauce like my all-time favorite from the Caribbean island of Grenada.

I am curious, what do you like to top your pate with? And what is your favorite liver to use?

Anyway,

Happy Hunting! 

Bomb Bear Burrito

For the past few weeks I have been thinking over and over in my head how to best describe bear meat. I have made a couple recipes with the intention of sharing with family and friends as an introduction to bear meat, and have felt their palpable resistance to giving it a try. Offer up a slice of deer or elk steak, people will most likely grab it from the plate with little hesitation. Share a new pronghorn recipe with a wild game greenhorn, and the pause is brief before they bite in. Say you’re latest recipe has bear meat, and you’re likely to hear crickets.  

JUMP TO RECIPE

BearBurritoFinal.jpg

Once people’s initial shock has passed, the first question is usually: “Well, what does it taste like?” And that is a hard question to answer.

My gut reaction to the question is to simple say: “Pork.” And as soon as the word leaves my mouth it feels incorrect. So I go into correction mode.

“Well, it kind of tastes like pork. But the texture is nothing like pork. And actually it doesn’t taste like pork.”

So, that answers no one’s questions and we are back to square one. What does bear meat taste like?

Some of it depends on the region and time of year the bear is harvested in. The diet of a bear varies not only by the season, but also the terrain. At certain times of the year, bears’ diets can be up to 90% vegetation based from shrubs, brush, grasses, to berries, roots, and bulbs. They also fancy insects, fish, and other meats. So, needless to say, what they are eating is highly varied and this can affect the way the meat tastes.

The other factor affecting the meat’s taste and texture is the fat content of the animal. Bears in general are a fatty animal, and their meat is often described as greasy or oily.  A spring bear emerging from winter’s hibernation is obviously much leaner than a fall bear ready for the big nap, so the season a bear is harvested can also affect the taste and texture of the bear.

With those factors set aside, the most basic way to describe the taste of bear meat is it tastes like bear meat. It’s a unique experience. It slightly similar to domesticated beef in texture, but the meat grains are longer and a bit coarser.

Bear meat has a relatively mild flavor but also a touch of sweetness you won’t find in any other meat. It is a darker meat than beef or even deer or elk, but doesn’t have the slight iron taste you experience with dark red meats like from duck or geese.

Starting to sound like a meat you would like to experience? Here is a recipe for a Bomb Bear Burrito that is the perfect introduction to bear meat.

Preparing the Bear Meat

While there are many cooking methods available for wild game that conclude with delicious results, my favorite method for bear is low and slow. Slow cooking bear meat allows the flavors to really meld together but also results in a delightfully tender texture.

BearBurritoSeasoning.jpg
BearBurritoMeat.jpg

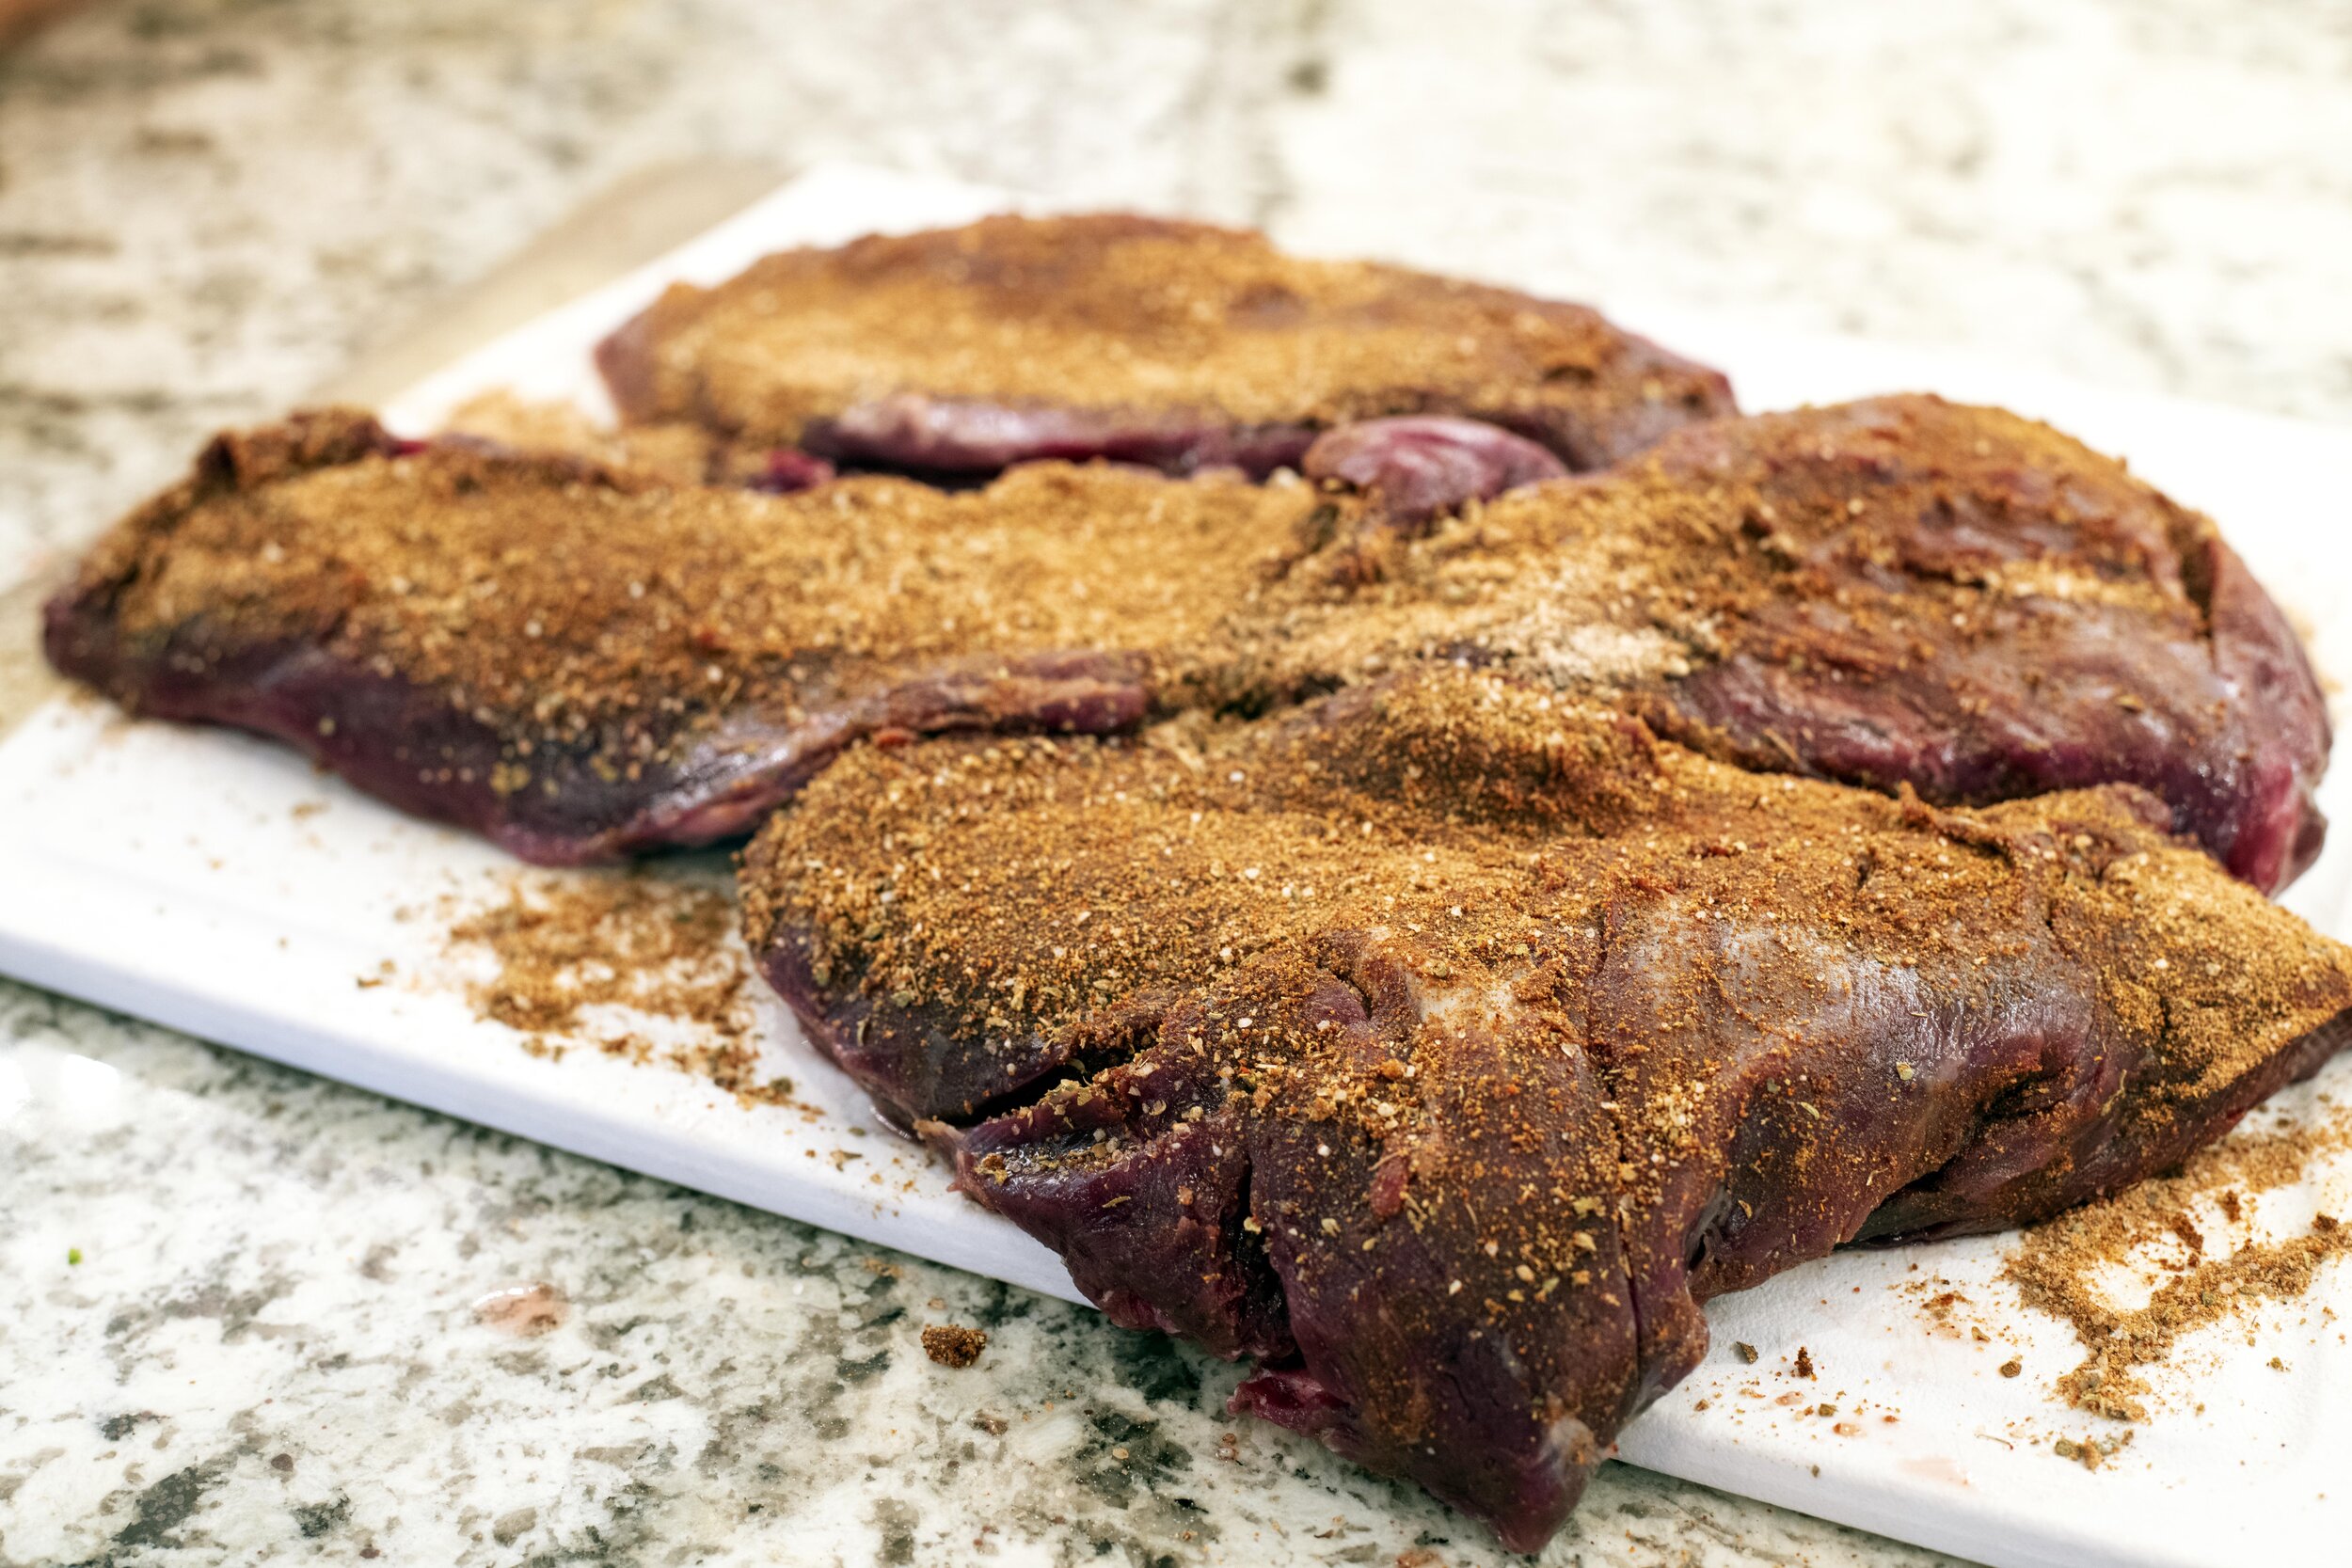
For this Bomb Bear Burrito, I rubbed the bear with a very simple spice blend: cumin, coriander, chili powder, cayenne, oregano, salt, garlic powder, and onion powder. I used a tablespoon of each and rubbed it on both sides of my chucks of bear. From we head to the crock pot.

Place the seasoned bear chunks in the crock pot and pour over about two cups of vegetable stock. You could also use chicken or beef stock if that is what you have on hand. Water would also work, things just might be a little less flavorful.  Cover the pot, set it to low, and let the crock pot work its magic for seven hours.

BearBurritoCrockpot.jpg

During the seven hour wait for my crock pot bear meat, I usually do things like go to work, clean the bathroom, go grocery shopping, work in the yard, eat snacks (but not so many snacks I get to full for dinner), and watch Netflix marathons of long forgotten TV series from my childhood. Basically, the nice thing about the crock pot is it frees you up for the other important things going on in your life.

Fast forward to seven hours in the future and the bear meat should be tender, juicy, and flavor soaked. Pull the meat from the crock pot and place on a cutting board. Remove the liquid from the crock pot. Shred the bear meat into bite size pieces and return to the crock pot.

The Guava Barbeque Sauce

BearBurritoPaste.jpg

This sweet and tangy barbeque sauce is the perfect pairing for bear meat. Like bear meat, it has this subtle sweetness to it that you can taste but it doesn’t overwhelm the entire profile of the dish. It is also extremely easy to pull together and would be great over pork or shredded beef as well in other eating situations.

To start, in a medium sauce pan over medium heat add a cup of diced up guava paste. To the paste, pour over a 1/3 cup of apple cider vinegar and a quarter cup of whiskey (your choice there on the brand). Also add in three tablespoons of tomato paste. Stir everything the best you can, it might be a bit difficult at this point since it takes a bit for the guava paste to break down, but just do your best.

BearBurritoGuavaSauce.jpg

Mix in a tablespoon of Worcestershire sauce, a tablespoon of coconut aminos (or soy sauce if you don’t have coconut aminos and aren’t interested in adding them to your pantry), two teaspoons of ground ginger and cinnamon, a teaspoon of garlic powder, a teaspoon of ground mustard, and salt and pepper to taste.

Let the guava barbeque sauce simmer for five minutes so it will breakdown the guava paste and everything can be mixed to a smooth texture. Then, pour the sauce over the shredded bear meat in the crock pot, turn the pot to high, and let things warm while you prepare the rest of the ingredients for this Bomb Bear Burrito.

The Caramelized Onions

Continuing with the theme of slightly sweet, next on the agenda is to make some caramelized onions. Before we go through the very simple task of caramelizing onions I want to first say that I love them. They are fantastic! Sweet and just a little bit salty, caramelized onions make everything better. Having a bad day? Boss getting ya down? Kids climbing the walls? Make some caramelized onions and things will suddenly be better. Life can suddenly be viewed through rose colored glasses, and all it took was some slow cooked, caramelized onions.

BearBurritoOnions.jpg

Okay, so enough on that weird tangent, in a decent sized pan over medium heat add a few tablespoons of olive oil. While the oil is heating, thinly slice two large yellow onions. Place the onions in the pan, coat them in the oil, sprinkle with a teaspoon or so of salt, and let them slow cook, stirring occasionally for five minutes.

At the five minute mark, sprinkle over a tablespoon of sugar and add a quarter cup of balsamic vinegar. Stir everything and let them continue to slow cook. You want the onions to be slowly cooking but the heat to not be so high they are burning. They should start to brown because of time, not too much heat. After another five minutes or possibly a little more, you should have a beautiful, browned pile of caramelized onions.

The Cheese Sauce

This creamy, silky cheese sauce is quick and easy to make. In a medium sauce pan, add two tablespoons of olive oil and a tablespoon of butter. Over medium heat, melt the butter. Once it is melted down add a minced shallot to the pan.

BearBurritoSauce.jpg

Cook the shallots for three to four minutes then sprinkle three tablespoons of flour over the butter and shallot. Whisk the flour into the oils until a mellow yellow paste is formed. Slowly whisk in two cups of vegetable (or chicken if that is what you have on hand) into the paste. Whisk until the paste has completely broken down and dissolved into the liquid.

Bring the liquid to a low boil so it will thicken. Once the sauce has started to thicken it is time to season the sauce. Add a teaspoon cumin, garlic powder, and half a teaspoon of salt. Also add in the half cup of sour cream.

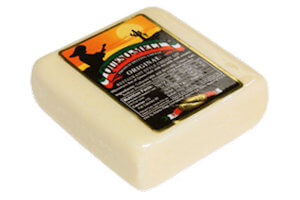
For this recipe I used a quesadilla melting cheese. Quesadilla melting cheese is usually a little more dense in texture than other cheeses and less salty. It makes for a cheesy but creamy sauce. Diced up about a cup of the melting cheese and continue to stir the sauce until the cheese is fully incorporated and the sauce is thick and silky.

Compiling the Bomb Bear Burrito

Pile a large helping, I am thinking it probably works out to about a cup, of the guava barbeque sauce shredded bear meat onto the burrito size flour tortilla. Add a few spoonful scoops of the caramelized onions on top of the bear meat. Now, burrito fold that bear up.

Heat the skillet used for the caramelized onions to high heat. Place the burrito into the skillet seam side down and cook for one minute. Flip the burrito and cook the other side of another minute.

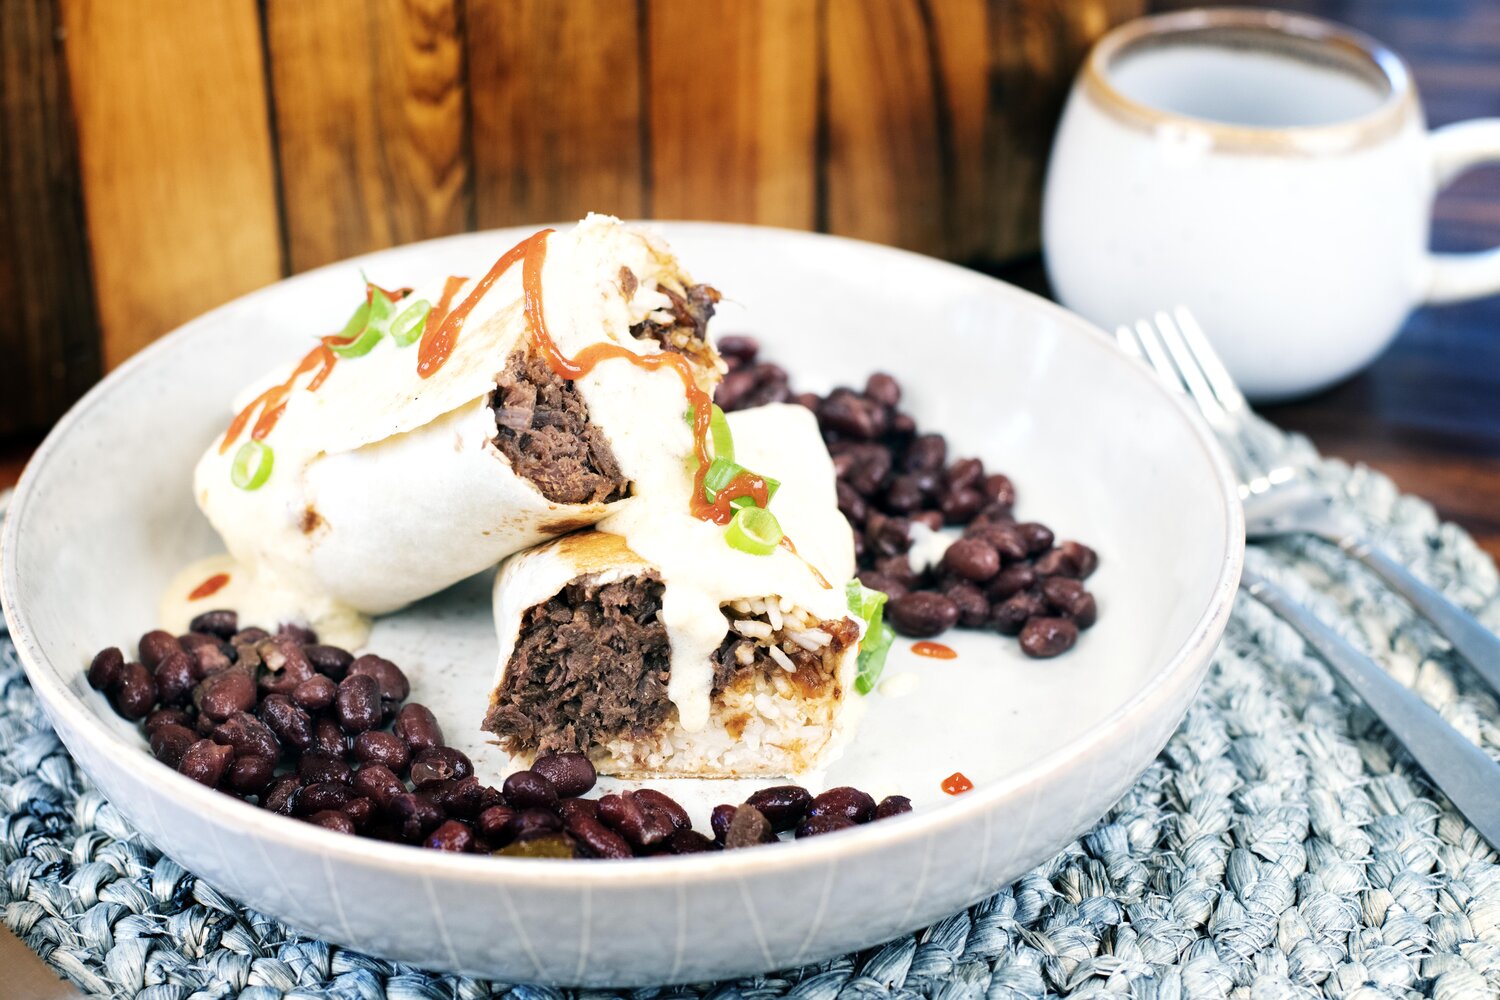
Plate the burrito and pour a healthy serving of the sour cream cheese sauce over the burrito.

And that is it for this Bomb Bear Burrito! Time to dig in for a sweet, savory, and cheesy burrito. Enjoy!

Happy Hunting!
Looking for other fun bear recipes to try? Check out this Barbacoa Bear Bowl!

Hello, World!

Yield: 8
Author: a 12 Gauge Girl
Bomb Bear Burrito

Bomb Bear Burrito

Hearty, slow cooked shredded bear is drenched in sweet and savory guava barbeque sauce with caramelized onions. The burrito is topped with a light and creamy cheese sauce.
Prep time: 15 MinCook time: 8 HourTotal time: 8 H & 15 M

Ingredients

Guava Barbeque Sauce and Bear Meat Ingredients
  • 2 to three pounds of bear meat chunks (or deer, elk, pronghorn, moose, beef, extra)
  • 1 tablespoon cumin
  • 1 tablespoon coriander
  • 1 tablespoon chili powder
  • 1 tablespoon cayenne
  • 1 tablespoon oregano
  • 1 tablespoon garlic powder
  • 1 tablespoon onion powder
  • 1 tablespoon salt
  • 2 cups vegetable stock
  • 1 cup guava paste, diced
  • 1/3 cup apple cider vinegar
  • 1/4 cup whiskey
  • 1 tablespoon Worcestershire sauce
  • 1 tablespoon coconut aminos
  • 1 teaspoon ground ginger
  • 1 teaspoon garlic powder
  • 1 teaspoon cinnamon
  • 1 teaspoon ground mustard seed
  • Salt and pepper to taste
Caramelized Onions Ingredients
  • 2 large yellow onions, thinly sliced
  • 3 tablespoons olive oil
  • 1 teaspoon salt
  • 1/4 cup balsamic vinegar
  • 1 teaspoon sugar
Sour Cream Cheese Sauce Ingredients
  • 1 tablespoon butter
  • 2 tablespoons olive oil
  • 1 medium shallot, minced
  • 3 tablespoons flour
  • 2 cups vegetable stock
  • 1 teaspoon cumin
  • 1 teaspoon garlic powder
  • 1/2 teaspoon salt
  • 1/2 cup sour cream
  • 1 cup quesadilla melting cheese

Instructions

Guava Barbeque Sauce and Bear Meat
  1. Rub the bear chunks in the seasoning spices: the tablespoon of cumin, coriander, chili powder, cayenne, oregano, garlic powder, onion powder, and salt.
  2. Place the seasoned bear chunks in a crock pot and pour in two cups of vegetable stock.
  3. Place the lid over the pot and set to low. Allow to slow cook for seven hours. 
  4. Once the bear meat is tender and cooked through, remove from pot and shred. Discard cooking liquid and return shredded bear to the crock pot.
  5. To make the guava barbeque sauce, in a medium sauce pan, add the diced guava paste.
  6. Heat the paste over medium heat and add in apple cider vinegar and quarter cup of whiskey. Stir to break down the guava paste.
  7. Once the paste has incorporated with the vinegar and whiskey, add in a tablespoon of Worcestershire sauce, tablespoon of coconut aminos, and teaspoon each of ground ginger, garlic powder, cinnamon, and ground mustard seed.
  8. Season to taste with the salt and black pepper.
  9. Pour the finished guava barbeque sauce over the shredded bear meat and allow the meat to heat up in crock pot until the rest of the burrito ingredients are finished.
Caramelized Onions
  1. In a large skillet over medium heat, add three tablespoons of olive oil and the two large thinly sliced onions. Allow the cook down five minutes, stirring to keep the onions from burning.
  2. At the five minute mark, add the sugar and balsamic vinegar. Continue cooking and stirring for at least five more minutes, longer if the onions are not as caramelized as you desire.
Sour Cream Cheese Sauce
  1. In a medium saucepan over medium heat, melt a tablespoon of butter with two tablespoons of olive oil. Add the minced shallot and cook for three to four minutes.
  2. Sprinkle the flour over the shallots, and whisk until a light paste forms. Add in the two cups of vegetable stock and whisk until paste is completely dissolved.
  3. Let mixture come to a light boil and slightly thicken.
  4. Add in the cumin, garlic powder, and salt.
  5. Stir in the half cup of sour cream and the cup of quesadilla melting cheese. Stir until everything is melted together and smooth.
  6. To plate the burrito, add a cup or two of the guava bear meat to the tortilla. Top with the caramelized onions and fold closed. 
  7. In the onion skillet over high heat, place the burrito seam side down and cook for one minute. Flip and cook a minute more. 
  8. Drench the burrito in the sour cream cheese sauce and dig in to this Bomb Bear Burrito. 
Created using The Recipes Generator


Antelope Kabobs: Antelope, Cantaloupe, and Pumpkin Pie

Antelope Kabobs: Antelope, Cantaloupe, and Pumpkin Pie

Sweet marinated antelope kabobs are paired with fresh cantaloupe and onions. Finish the bite off with a pumpkin pie inspired dipping sauce.